The Slider Bridge Exercise
Leah ZahnerAre you looking to improve your posture? Maybe strengthen your core? How about a better looking back side? All of these are benefits that can be achieved from learning how to do the slider bridge exercise.
If you spend a good portion of your day in a seated position, your glute muscles weaken and your hip flexors can shorten. The result? Tightness. The slider bridge exercise strengthens the glutes resulting in less pain in the hips, knees and lower back.
Start by purchasing two sliders. You can find them for less than $15 on Amazon.
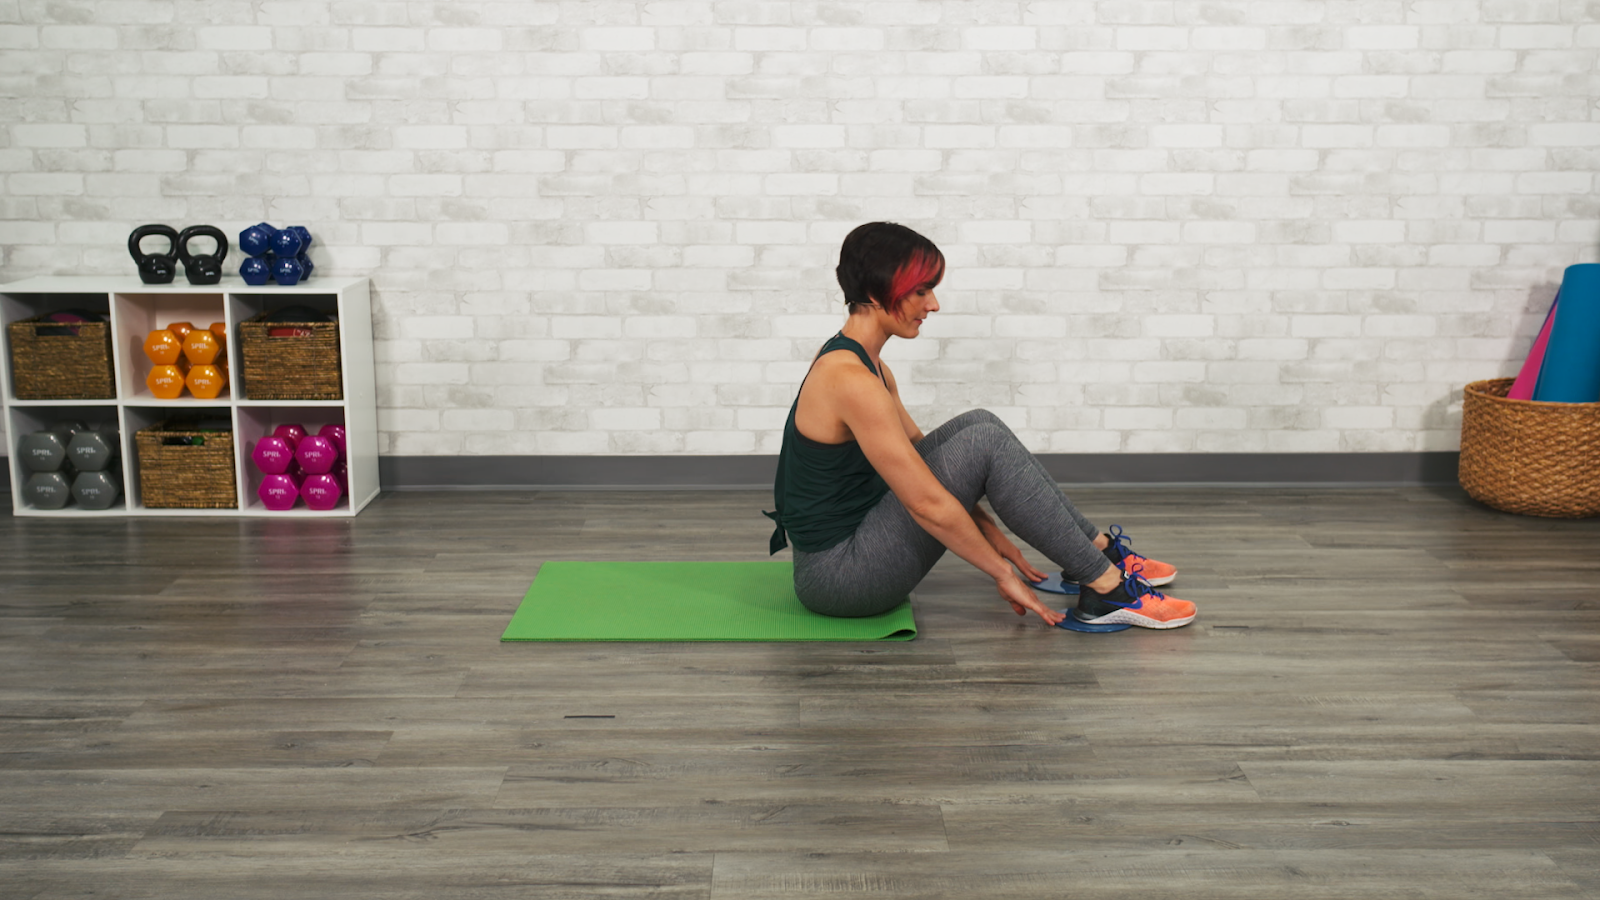
Step 1
Start by putting your feet on the sliders in a seated position.
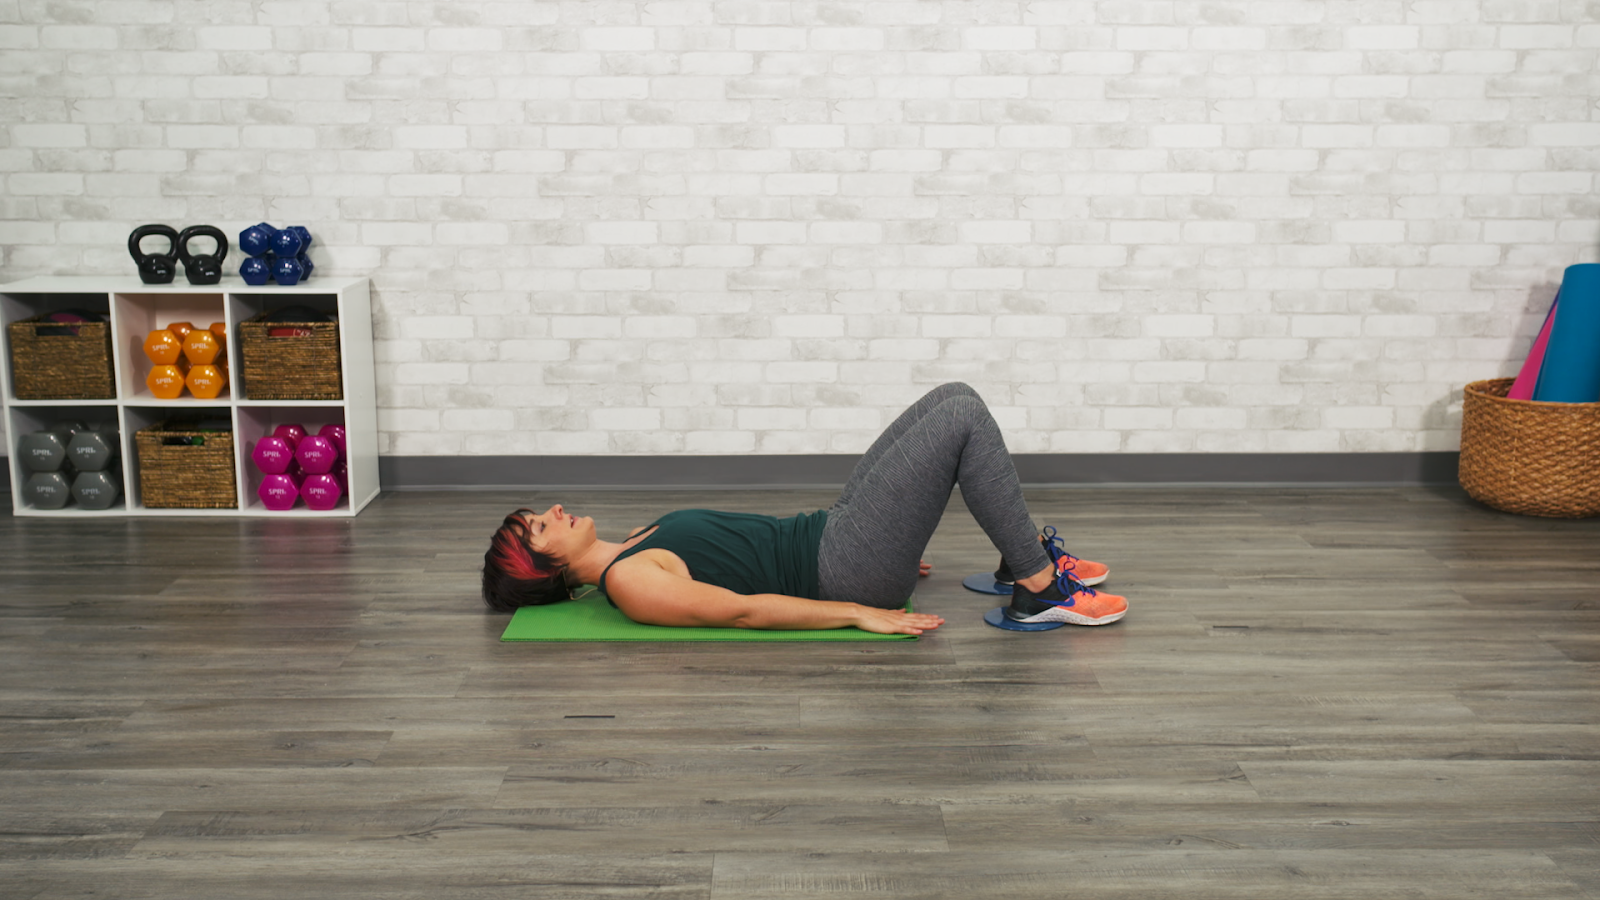
Step 2
Keep your feet on the sliders and rest your upper body on the floor.
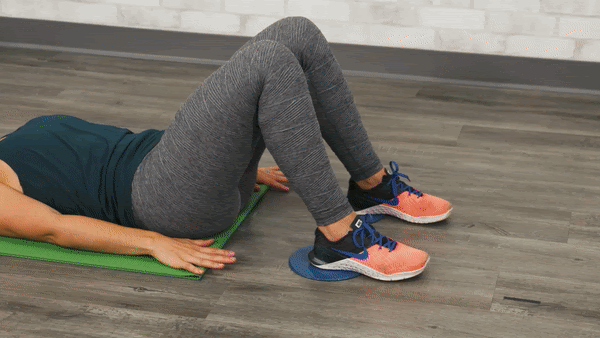
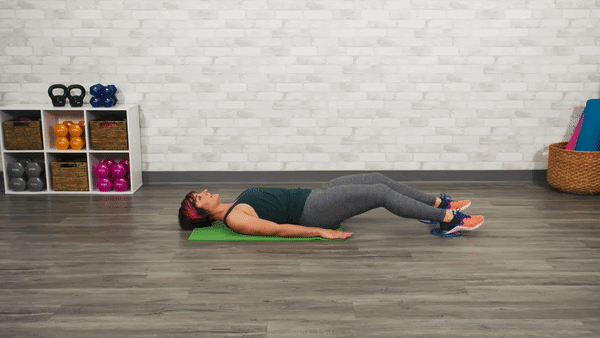
Step 3
Next, extend your legs out in front of you. Then press your entire body into the floor. Finally, bend your knees to lift your hips up off of the floor, hold it for a second and then return your feet to the starting position.
Variation
If you want to step this exercise up a notch, try one legged slider bridges. Put the leg that isn’t sliding into the air. Make sure you alternate legs to avoid imbalances.
Remember, it’s more important to have quality movements throughout this exercise than the amount of reps. Go slow and get it right before attempting to push your limits.
Check out “Slider Exercises for a Better Finish Position” and “IT Band Foam Roller” to help improve your bowling performance along with quality of life.

Share tips, start a discussion or ask other students a question. If you have a question for an expert, please click here.
Already a member? Sign in
No Responses to “The Slider Bridge Exercise”