Quick Tip: How to Insert Bowling Thumb Tape
Erik VermilyeaDescription
Whether you are a beginner, or a seasoned vet at inserting bowling thumb tape, this quick tip can refresh your memory or teach you how it is done.
It’s always good to have a piece of bowling thumb tape in your thumbhole. You can always add one more if need be to tighten your grip, or remove them all together to loosen it. Whichever way you decide to go, the goal is to reduce grip pressure.
Coach Erik Vermilyea with Track demonstrates how to properly insert bowling thumb tape.
Inserting Bowling Thumb Tape
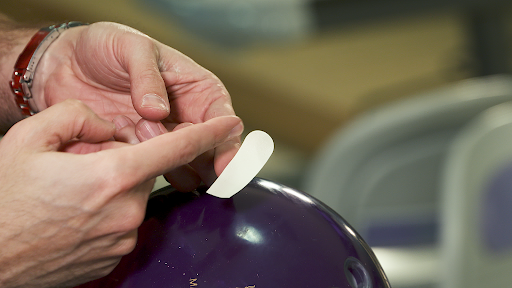
After removing the tape from the strip you’ll notice that there are both a round and a flat side on the bowling thumb tape. Generally, the round side of the white bowling thumb tape inserts into the thumb hole.
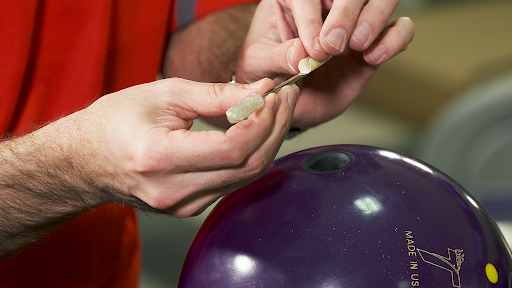
Next, use a tape insertion tool, small screwdriver, or a knife to insert bowling thumb tape.
When you insert bowling thumb tape, insert it at a 45° angle. This is an important step for both novices and pros alike. Your thumb does not squeeze straight towards the finger holes. Your thumb sits in the ball around 45°, so it important to match the angle of tape to the angle of your thumb, not just insert it at a 90° angle (straight on).
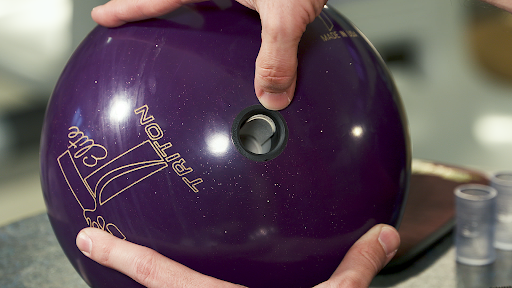
Finally, when you put your thumb in the ball, take a look at the way your thumb flexes. Make sure the pad of the tape matches the pad of your thumb. It should fit flush on both pads.
You can find more quick tips like this one in all of our categories. Make sure you check out when to replace tape and finger inserts to learn more on the topic, and you can always see more bowling equipment videos from our coaching experts at National Bowling Academy.
Premium Membership
Unlock exclusive member content from our industry experts.
- 24/7 Access to Premium Videos, Lessons, and Tips
- Step-by-Step Instructional Demos and Techniques
- 50% Off Video Downloads Purchased in the National Bowling Academy Shop
- Access to Ask the Expert Program
Unlock exclusive member content from our industry experts.
- 24/7 Access to Premium Videos, Lessons, and Tips
- Step-by-Step Instructional Demos and Techniques
- 50% Off Video Downloads Purchased in the National Bowling Academy Shop
- Access to Ask the Expert Program
Gold Membership
$308 Value
Get everything included in Premium plus exclusive Gold Membership benefits.
- 24/7 Access to Premium Videos, Lessons, and Tips
- Step-by-Step Instructional Demos and Techniques
- 13 Full-Length Video Downloads to Watch Offline
- Discounts on Purchase-to-Own Content in the National Bowling Academy Shop
- Access to Ask the Expert Program
- Exclusive GOLD LIVE Streaming Events
Share tips, start a discussion or ask one of our experts or other students a question.
Already a member? Sign in
No Responses to “Quick Tip: How to Insert Bowling Thumb Tape”